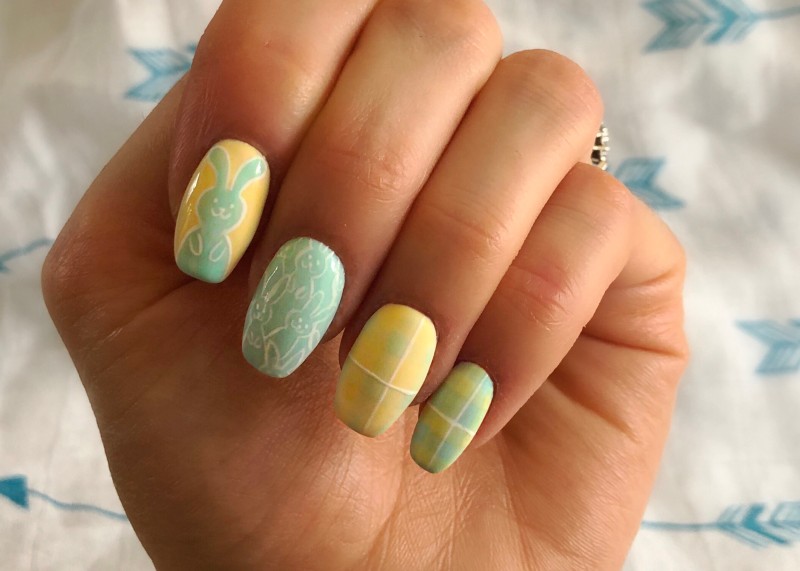
Nail Art Step by Step: Hopping Easter Bunnies

We love any excuse for nail art, and with Easter approaching there's nothing more suited than spring colours and uber-cute bunnies! Follow this step by step by Salon System nail expert Julie-Anne Larivière, who used Gellux gel polishes, that we're sure will get your clients hopping back for more!
 Step 3: With a medium liner brush slightly flattened, create three wide vertical stripes on the ring finger using Gellux I Sea You and Aloha Honolulu for the ring finger and little finger making sure you apply very thinly, then cure.
 Step 8: Then dip a fine detail brush or fine liner brush into Gellux Purely White and add the details to finish the bunny, and cure.
Step 9: Apply Gellux Matte Base/Top Coat to the little finger and ring fingers and Gellux Shiny Top Coat to the middle and index fingers, and cure.
Salon System Gellux is available from wholesalers nationwide.


